Operation, Installation, Safety, and Maintenance
Springfield Marine NZ Limited is not responsible for any injuries or damages caused by installation, operation, or maintenance of Shark products. This Operation and Maintenance Manual serves as a guide only.
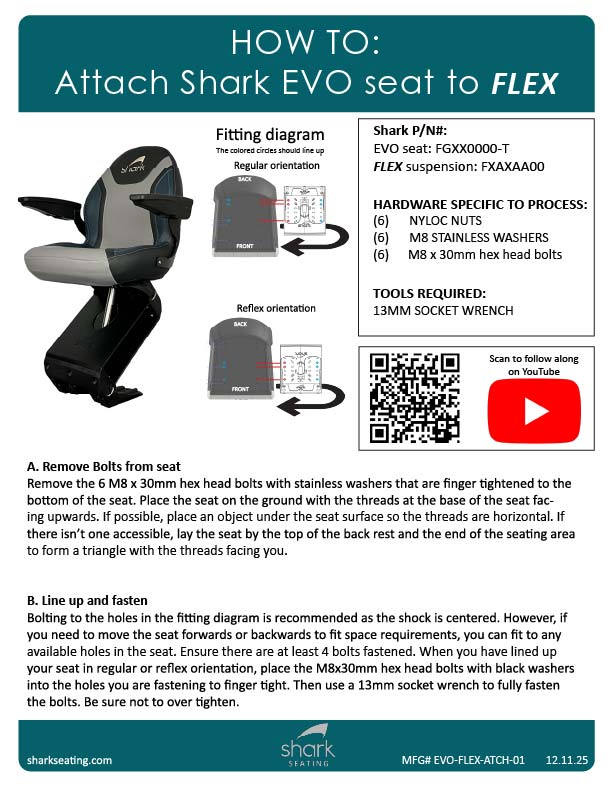
Attaching EVO to FLEX
View Brochure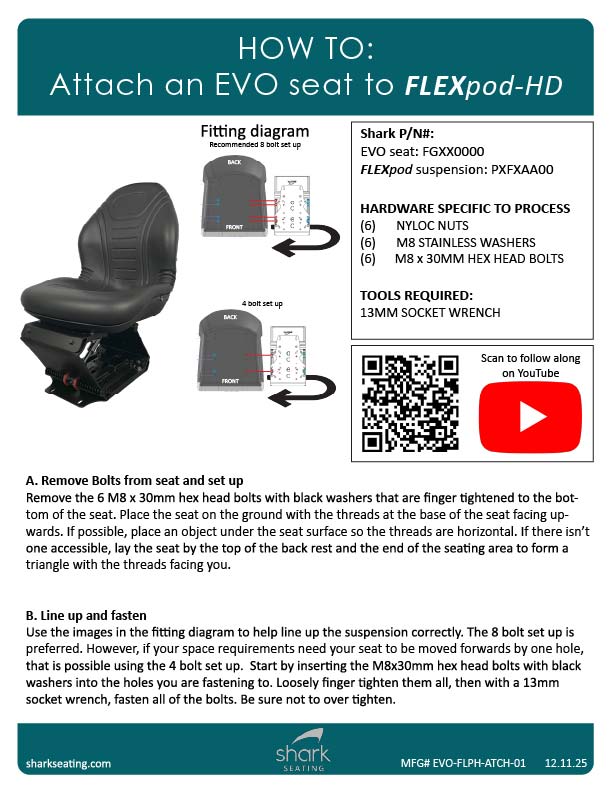
Attaching EVO to FLEXpod-HD
View Brochure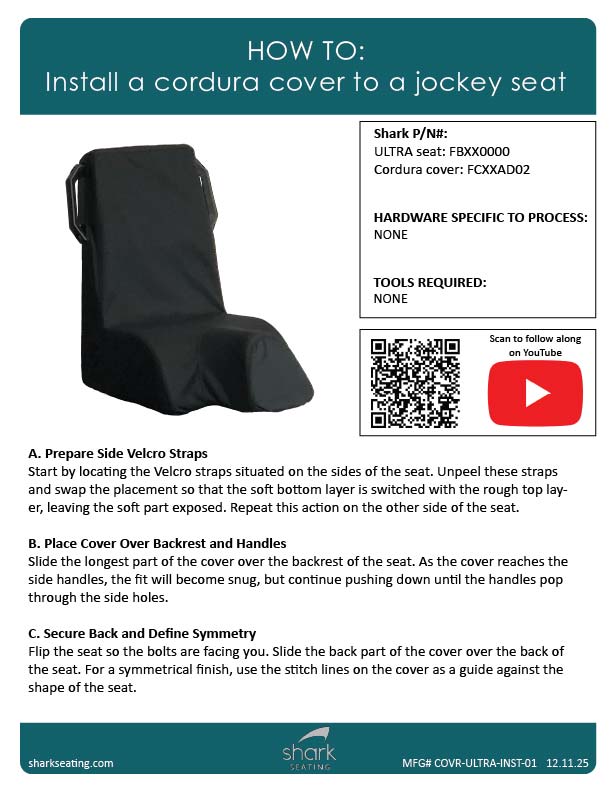
Installing Codura cover to Jockey Seat
View Brochure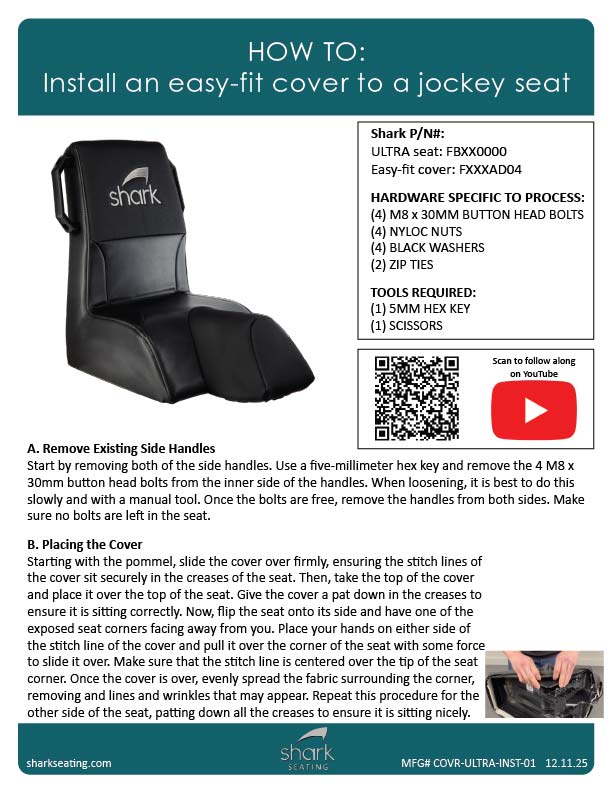
Installing Easy-fit EPIC cover to jockey seat
View Brochure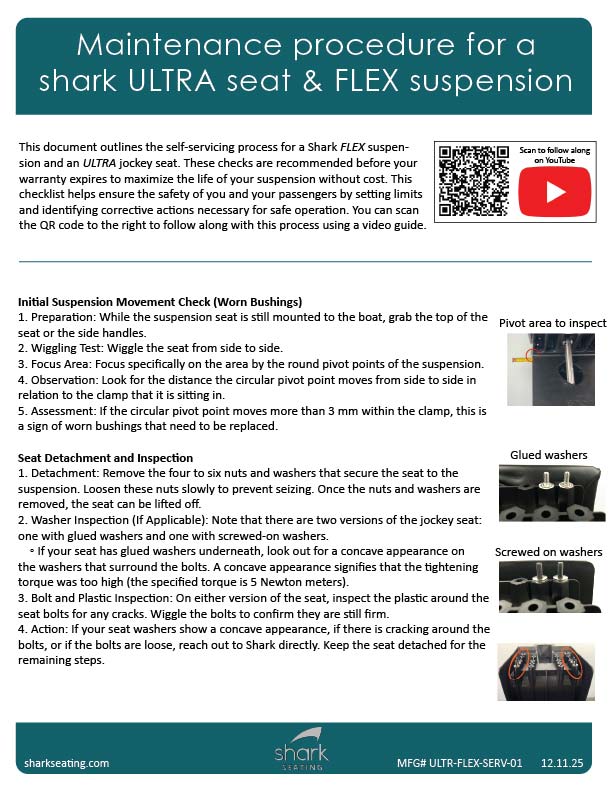
Maintenance procedure for ULTRA and FLEX
View Brochure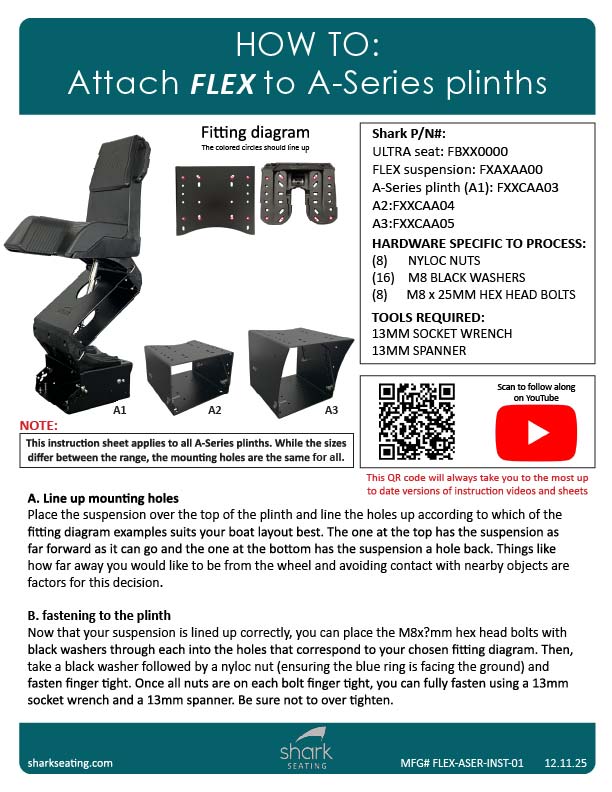
Attaching FLEX to A-series plinths
View BrochureMore Documents Coming Soon!
Find answers to your most common questions about operations, installation, safety, and maintenance.
Contact us- Occupants must be seated to the rear of the seat, with no air gap between them and the seat back.
- Footpegs will be necessary for those less than 1.7m tall when using the standard Shark 200 mm plinth and Jockey style seat.
- Do not jump or stand on footpegs, they are to be used while seated only.
- In the case of Jockey seats, the user must be seated with feet flat on the same surface that the plinth is mounted to, or using the supplied Shark footpegs. Using other footrests (especially those that are substantially in front of the seat) can cause injury to the occupant, and damage to the seat system.
- When using a bolster type seat with the Shark suspension (shown in second diagram below), ensure that feet are supported and not hanging. The suspension has lateral and fore-aft shock absorption designed to work in synergy with the legs. It is important to engage the legs when using this seat type.